Documentation Index
Fetch the complete documentation index at: https://setup.cevro.ai/llms.txt
Use this file to discover all available pages before exploring further.
Why Use Brand Variants?
Brand variants let you customize how the AI handles conversations depending on which brand the player is contacting from. If you operate multiple brands, this is how you tailor instructions, actions, and knowledge per brand.Per-Brand AI Procedures
You can create brand-specific variations of any AI Procedure (AIP). Each variation gets its own instructions, available actions, and tags — while sharing the same base procedure. Example: Bonus Tickets A player asking about bonuses from Brand A might get offered an active promotion for that brand. The same question from Brand B could get a different response — perhaps that brand doesn’t run promotions, or has different eligibility rules.Per-Brand Knowledge Base
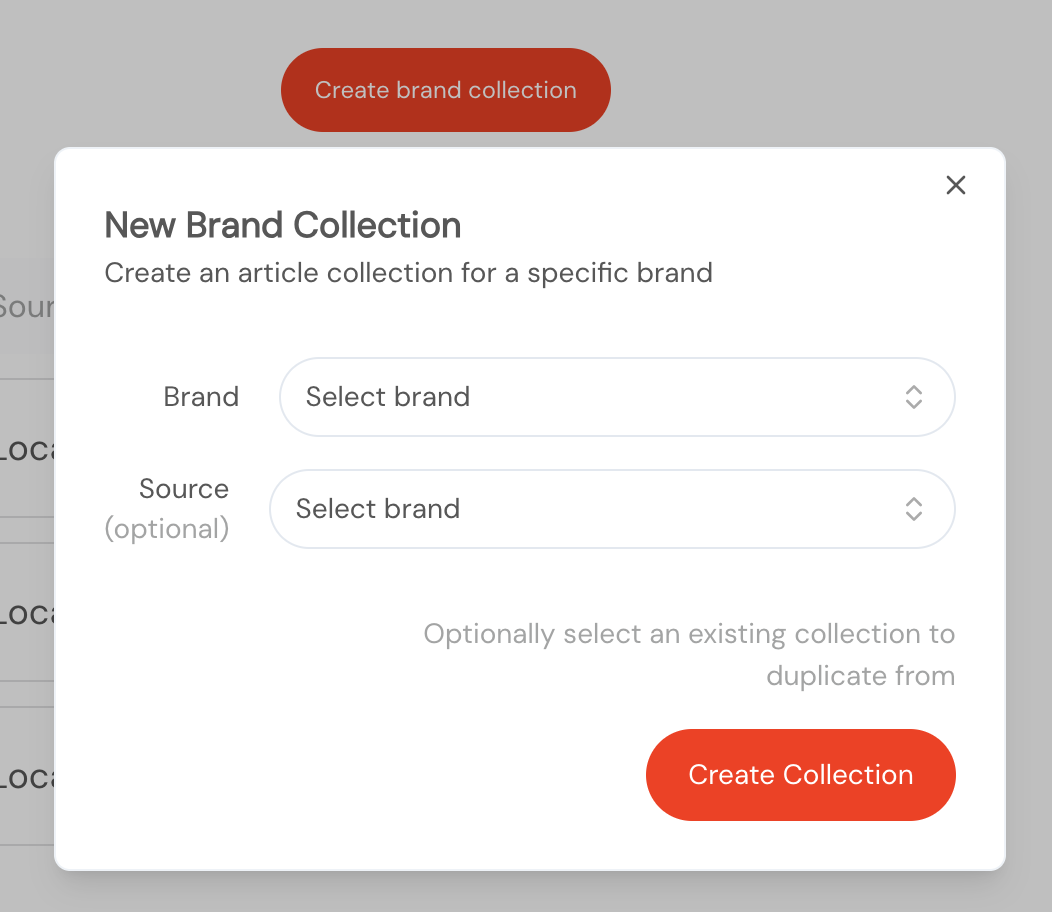
You can set different knowledge base collections for each brand. This keeps articles relevant — Brand A’s help content doesn’t bleed into Brand B’s responses. You can duplicate an existing brand’s articles when creating a new collection, so you don’t have to start from scratch.How to Add Brand-Specific Knowledge Base
Create Brand Collection
Click Create Brand Collection and select the brand this knowledge base will serve.
How to Set Up Brand Variants
Add brands to your account
Ensure all relevant brands are added in Settings → Brands. Map your helpdesk widget to the corresponding Cevro brand.
Add a brand variation to an AIP
Open the AI Procedure you want to customize. In the top left, click Add Brand Variation and select the brand. This excludes that brand from the default instructions and lets you define brand-specific instructions and actions.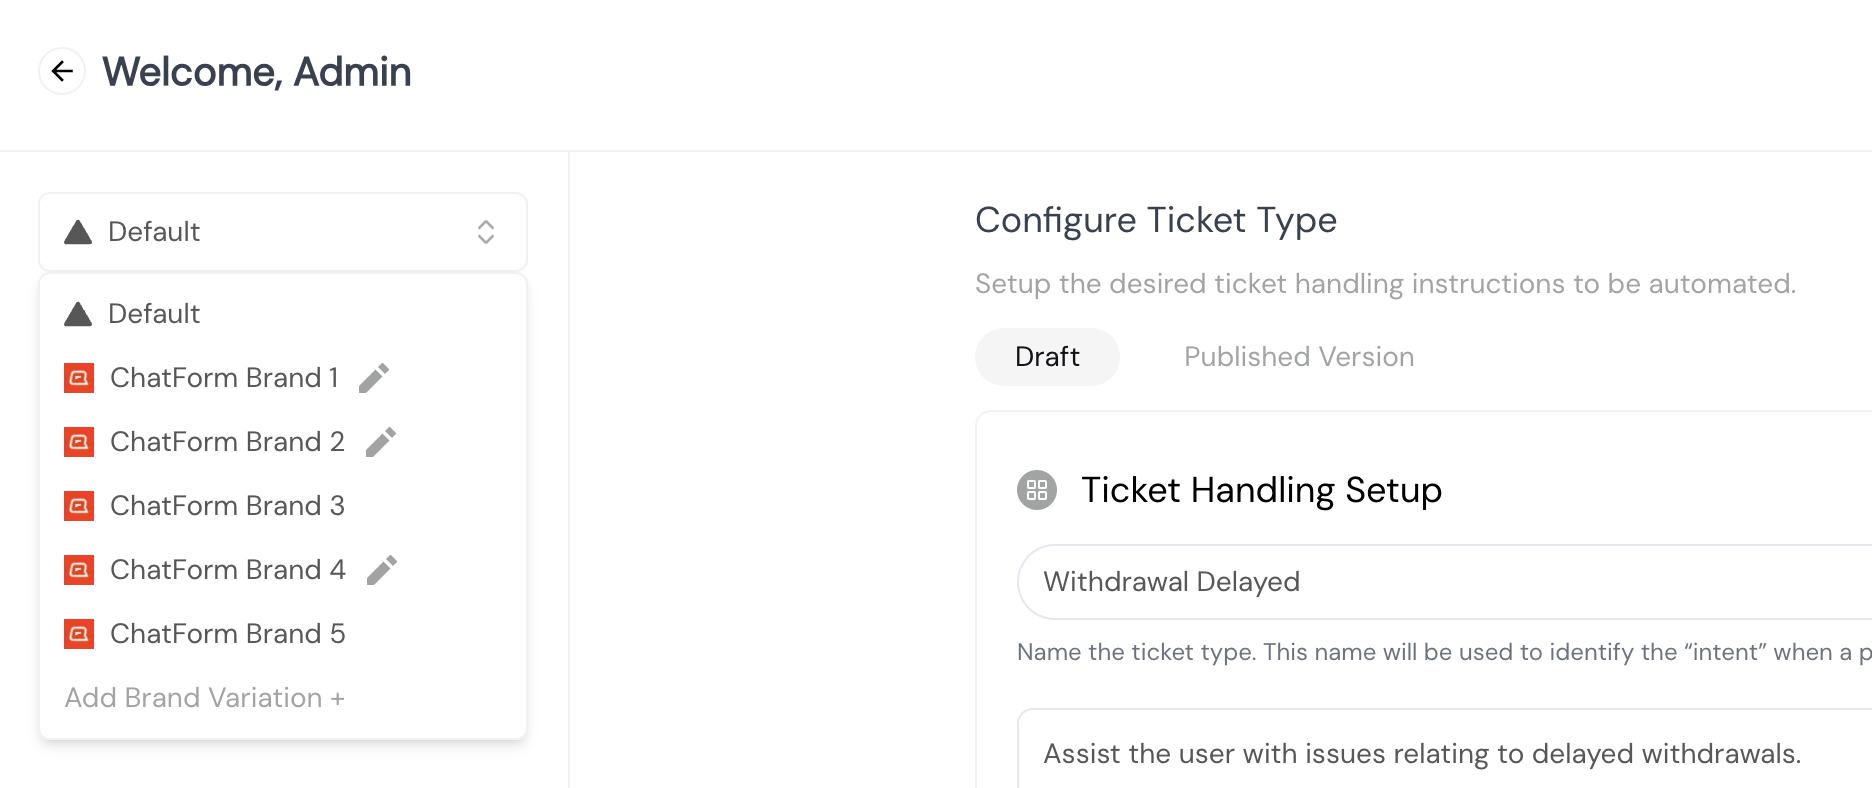
Test and activate
Test your brand-specific rules thoroughly using the AIP testing tools, then activate the procedure.
Enable the brand
Toggle on the brand from the Brands settings page.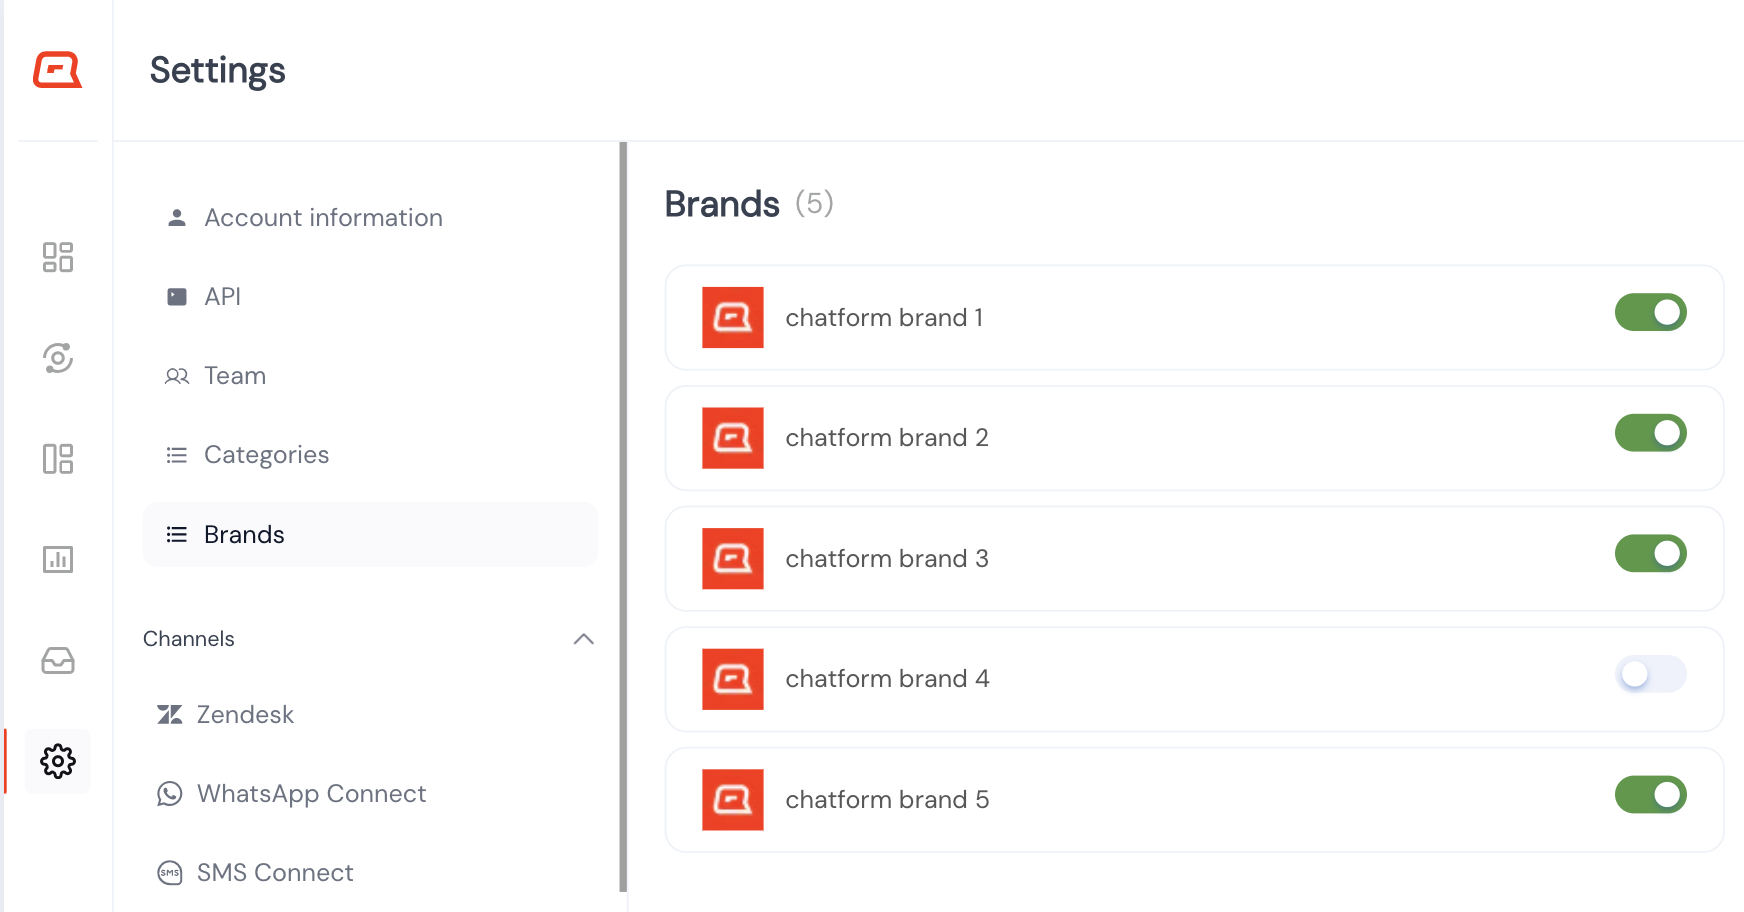
Make sure any existing helpdesk automations (welcome messages, chatbots) are removed for brands you’re enabling with Cevro, to avoid conflicts.